If you generate images with AI (or even just download images from the web), you’ve probably hit the same wall: the picture looks fine at first, but the moment you crop it, zoom in, or try to reuse it for a banner, it suddenly feels… soft.
That’s where an image upscaler becomes your best friend. A good upscaler helps you increase resolution and improve perceived detail so your final image looks cleaner for social posts, product listings, thumbnails, and even print.
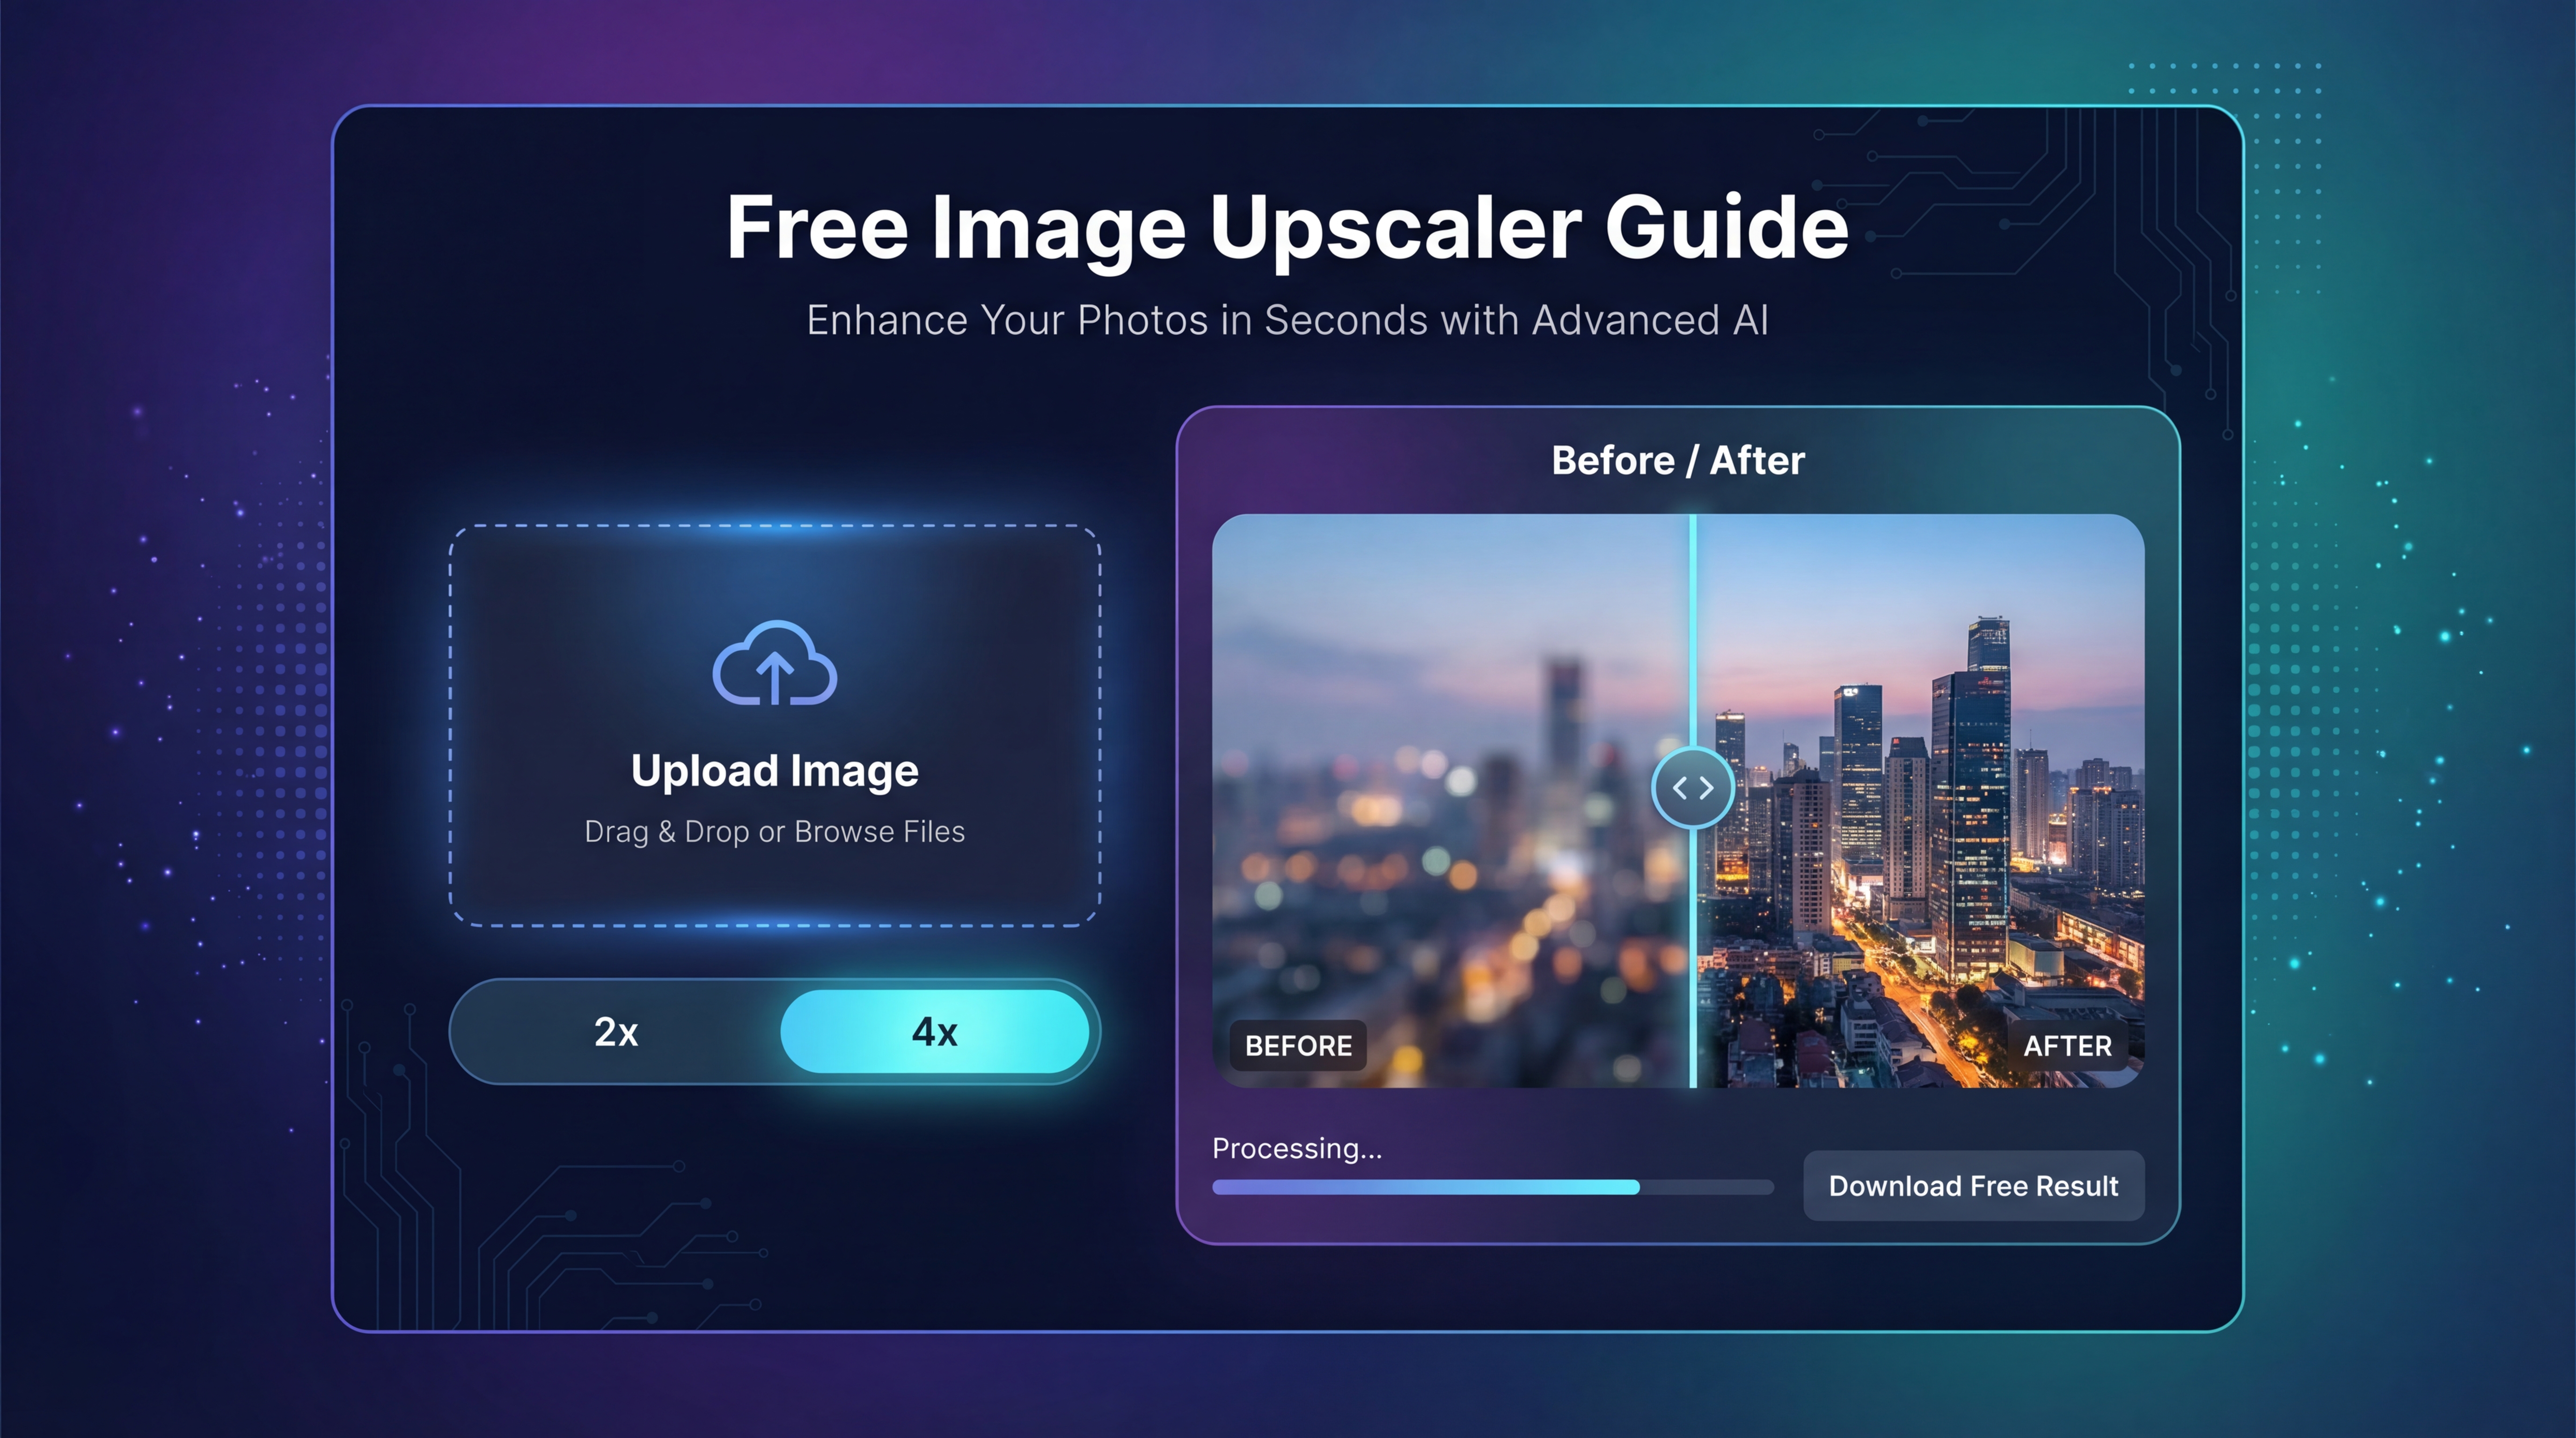
In this guide, we’ll walk through how to use Free Image Upscaler, when to pick 2x vs 4x, how to plug it into an AI image generation workflow, and which other FreeImgen tools to pair with it.
Why upscaling matters after image generation
AI images are often created at relatively modest sizes. Even when they look “high quality,” they can lose sharpness when you:
- Crop into a small detail (a face, a product label, a texture)
- Resize for a new placement (like turning a square into a wide header)
- Export for ads or e-commerce, where clarity affects performance
Upscaling is basically the step that helps your image survive real-world usage.
If you want a simple tool to do that quickly, Free Image Upscaler is designed for exactly this: upload → pick a scale → download a larger, sharper image.
What Free Image Upscaler does (and when it’s the right tool)
At its core, Free Image Upscaler increases your image size while enhancing details so the result looks clearer than a normal resize.
When it’s great
Use it when you need:
- Sharper AI art and illustrations
- Cleaner product images for listings
- Better-looking thumbnails and profile images
- Larger exports for banners, blog headers, and landing pages
For most people, the main decision is choosing between:
- 2x image upscaling (quick, natural-looking improvement)
- 4x photo upscaling (bigger jump in size, better for tight crops and print)
When it won’t magically fix the image
It’s important to set expectations. Upscaling can’t reliably repair:
- Bad hands/fingers in AI images
- Warped faces or broken geometry
- Tiny unreadable text
- Heavy compression artifacts
Think of upscaling as “make this cleaner and bigger,” not “rewrite reality.”
Benefits for creators and marketers
If you publish content regularly, the biggest benefit is speed. Instead of re-generating images again and again, you can upscale the best result and reuse it across formats.
Here’s what that looks like in practice:
- Faster production for social and ads using a free image upscaler online
- Cleaner crops for e-commerce and UGC creatives with AI photo upscaler output
- A quick “finish” step that doesn’t require design software
It’s also a nice fit if you prefer tools that feel straightforward—more like “do one job well,” instead of a complicated suite.
Step-by-step: how to upscale an image (beginner-friendly)
If you’ve never used an upscaler before, this is the whole workflow.
Step 1: Open the tool
Go to Free Image Upscaler.
Step 2: Upload your image
Upload the image you want to enhance. This can be:
- AI-generated art
- A product photo
- A screenshot you want to reuse in higher quality
- A logo or graphic (though tiny text can still be tricky)
Step 3: Pick your scaling level
This is where most people overthink. Here’s a simple rule:
- Choose 2x upscale for most web uses (social posts, blogs, thumbnails)
- Choose 4x image enhancer when you need room to crop or you’re targeting print/large placements
If you’re unsure, start with 2x resolution boost. It’s safer, more natural, and less likely to introduce halos around edges.
Step 4: Download and check quality
Download your result and do a quick reality check:
- View it at 100% zoom
- Inspect edges (hair, fabric, product outlines)
- Look for any crunchy sharpening or strange artifacts
Step 5: If needed, rerun smarter—not harder
If the 4x result looks too “processed,” redo it at 2x image upscale first. A clean 2x is often better than an aggressive 4x.
The best “generate → upscale → publish” workflow
If you’re building an image pipeline for content or marketing, here’s the simplest way to think about it:
- Generate your image
- Finalize composition (crop/positioning)
- Upscale at the end
- Export for each platform
Why upscale at the end? Because if you upscale too early and then crop heavily, you may waste quality where you don’t need it.
Tips for cleaner results
- Start with a clean source image (less noise, less blur)
- Avoid tiny text in your designs (upscaling isn’t a text miracle)
- For faces, use modest scaling—upscale image 2x often looks more natural
Common use cases (and what scale to pick)
1) Social posts, thumbnails, and blog images
Use increase image resolution free at 2x.
Why: social platforms compress anyway. A clean 2x gives you clarity without looking over-sharpened.
2) Product photos and UGC ad creatives
Try AI photo upscaler at 4x if you plan to crop tightly.
Why: product shots often need sharp edges and readable details.
3) Posters, merch mockups, and print-ish assets
Use upscale image online at 4x, then inspect carefully.
Why: print reveals flaws more easily, so you want resolution headroom.
4) Anime or illustration line art
Try 4x upscaler if you want crisp line clarity.
Watch out for: glowing outlines or halos. If you see those, step down to 2x.
Quality checklist: how to judge a good upscale
Before you publish, do a quick check:
- Edges: are they clean, or do they have halos?
- Texture: does it look detailed, or plasticky?
- Noise: is the image cleaner, or did it introduce grain?
- Text: if there’s small text, is it still messy? (Often yes.)
If artifacts appear, your fastest fix is usually:
- Re-run at 2x image upscaling instead of 4x
- Start with a higher-quality source image if possible
FAQ (quick answers)
Is Free Image Upscaler good for AI-generated images?
Yes—especially for taking a solid AI image and making it sharper for publishing. Start with 2x upscale if you want a natural look.
Should I choose 2x or 4x?
If your goal is web/social, 2x image upscaling is usually enough. If you need heavy cropping or larger exports, use 4x photo upscaling.
Will an image upscaler fix blur?
It can improve clarity, but it won’t perfectly recover missing detail. For severe blur or artifacts, consider regenerating or refining the image first.
Recommended FreeImgen tools to pair with Free Image Upscaler
Upscaling is most useful when it’s part of a simple toolkit. Here are a few FreeImgen tools that pair naturally with it.
- Start with Free Flux AI Image Generator when you want to create fresh images, then upscale the best outputs for publishing.
- Use Free Image-to-Image AI when you already have an image but want variations, improvements, or a style change—then finish with Free Image Upscaler for crisp resolution.
- Explore more options through FreeImgen’s AI Tools Hub if you want a lightweight workflow for generate → refine → upscale → export.
If you’re producing images regularly, Free Image Upscaler is the kind of small, reliable tool that quietly saves you time—because it helps one good image go further.